1RM.fit1RM.fit
Get Started Free
Exercise Library/Back

Back Exercises

Back exercises build the lats, traps, and rhomboids that create width, thickness, and the pulling strength behind every row and deadlift. A strong back also protects your posture and keeps your shoulders healthy under heavy pressing work. Combine vertical pulls like pull-ups and pulldowns with horizontal rows for balanced development.

256 back exercises
Band Assisted Pull UpHow-To
Band Assisted Pull Up
Back · Band
Barbell Bent Over RowHow-To
Barbell Bent Over Row
Back · Barbell
Barbell Pendlay RowHow-To
Barbell Pendlay Row
Back · Barbell
Barbell PulloverHow-To
Barbell Pullover
Back · Barbell
Barbell ShrugHow-To
Barbell Shrug
Back · Barbell
Cable PulldownHow-To
Cable Pulldown
Back · Cable
Cable Rope Seated RowHow-To
Cable Rope Seated Row
Back · Cable
Cable Seated RowHow-To
Cable Seated Row
Back · Cable
Cable Seated Row With V BarHow-To
Cable Seated Row With V Bar
Back · Cable
Cable Straight Arm PulldownHow-To
Cable Straight Arm Pulldown
Back · Cable
Dumbbell PulloverHow-To
Dumbbell Pullover
Back · Dumbbell
Dumbbell Renegade RowHow-To
Dumbbell Renegade Row
Back · Dumbbell
Dumbbell ShrugHow-To
Dumbbell Shrug
Back · Dumbbell
Dumbbell Single Arm Bent Over RowHow-To
Dumbbell Single Arm Bent Over Row
Back · Dumbbell
Inverted RowHow-To
Inverted Row
Back · Bodyweight
Lever Back ExtensionHow-To
Lever Back Extension
Back · Leverage Machine
Lever Cross Lat PulldownHow-To
Lever Cross Lat Pulldown
Back · Leverage Machine
Lever Lying T Bar RowHow-To
Lever Lying T Bar Row
Back · Leverage Machine
Lever One Arm Seated Row (seated Row Machine)How-To
Lever One Arm Seated Row (seated Row Machine)
Back · Leverage Machine
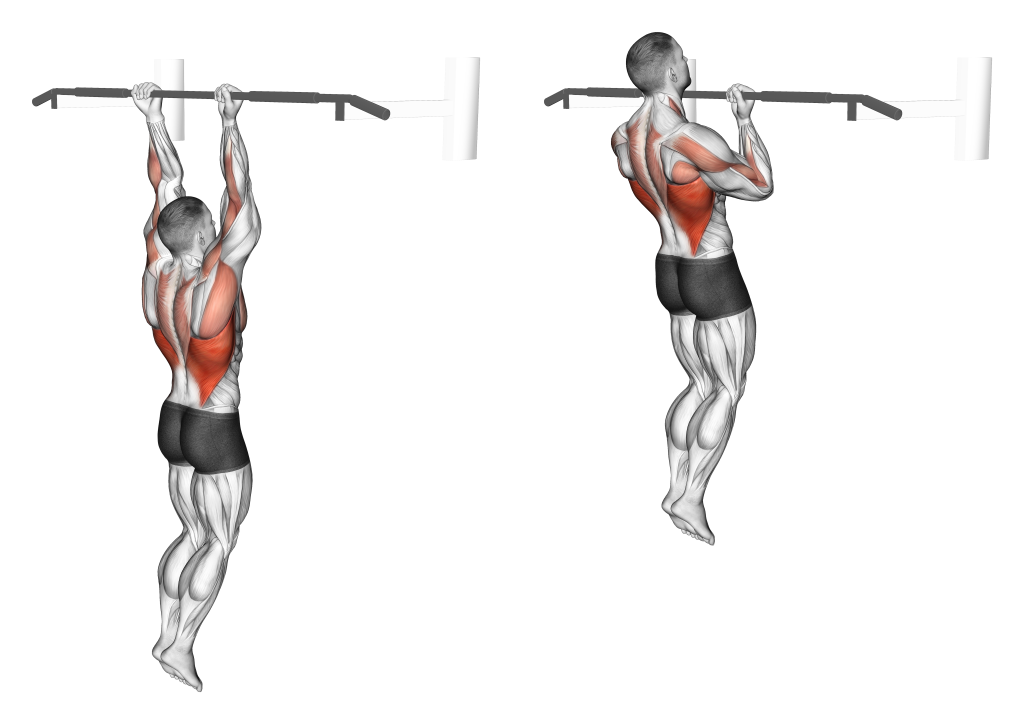
Mixed Grip Chin UpHow-To
Mixed Grip Chin Up
Back · Bodyweight
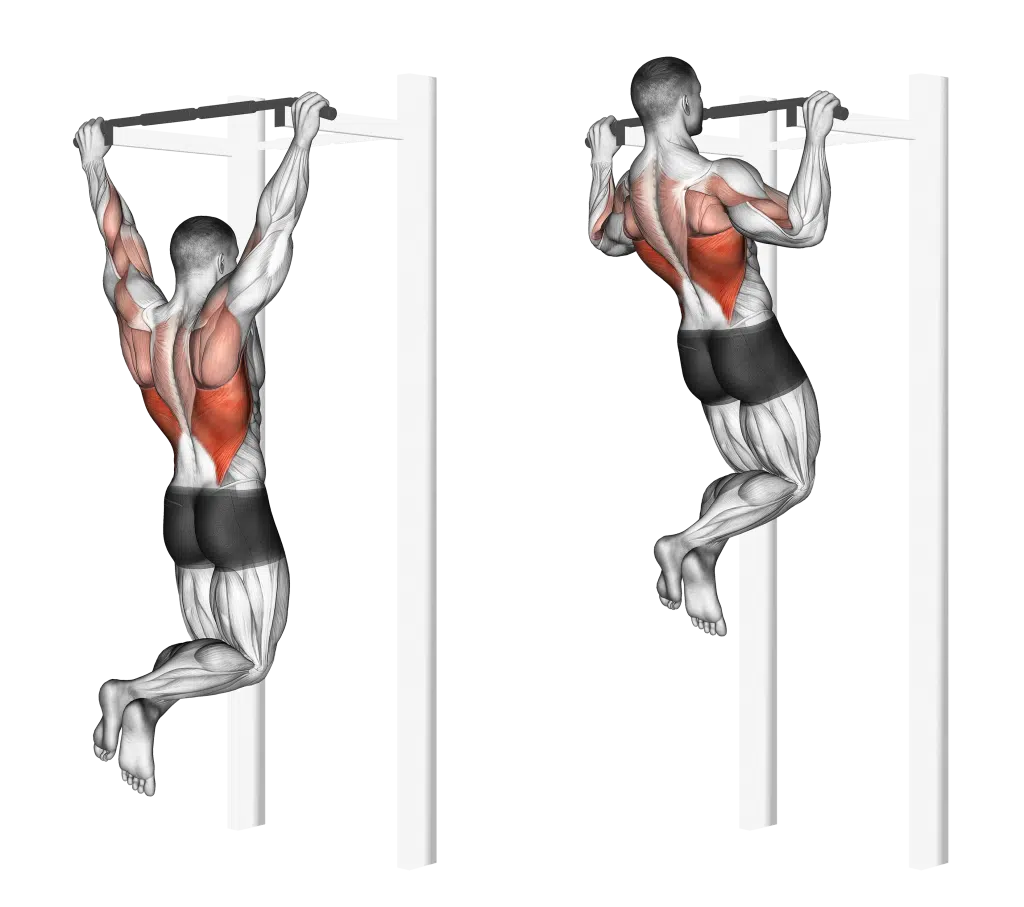
Pull UpHow-To
Pull Up
Back · Bodyweight
45 Degrees Back Extension
Back · Bodyweight
Armless Prayer Stretch
Back · Bodyweight
Around The World Superman Hold
Back · Bodyweight
Assisted Oblique And Latissimus Dorsi Stretch On Stability Ball
Back · Bodyweight
Band Alternate Lat Pulldown With Twist
Back · Band
Band Alternate Low Row Wtih Twist
Back · Band
Band Assisted Chin Up (from Knee)
Back · Band
Band Assisted Pull Up (version 3)
Back · Band
Band Bent Over Lat Pulldown
Back · Band
Band Bent Over Row
Band Bent Over Row
Back · Band
Band Bent Over Wide Grip Row
Back · Band
Band Close Grip Pulldown
Back · Band
Band Close Grip Row
Band Close Grip Row
Back · Band
Band Deadlift With Single Arm Row
Back · Band
Band Fixed Back Close Grip Pulldown
Back · Band
Band Kneeling One Arm Pulldown
Back · Band
Band Knelling Lat Pulldown
Back · Band
Band Narrow Grip High Row
Back · Band
Band One Arm Standing Low Row
Back · Band
Band One Arm Standing Wide Grip Low Row
Back · Band
Band One Arm Twisting Seated Row
Back · Band
Band Resisted Chin Up
Back · Band
Band Seated Row
Band Seated Row
Back · Band
Band Seated Underhand Grip Row
Back · Band
Band Shrug
Band Shrug
Back · Band
Band Skier
Band Skier
Back · Band
Band Standing Single Arm Row
Back · Band
Band Standing Single Arm Twist Row
Back · Band
Band Standing Straight Arm Pulldown
Back · Band
Band Straight
Band Straight
Back · Band
Band Underhand Pulldown
Back · Band
Bar Biceps Curl
Bar Biceps Curl
Back · Bodyweight
Barbell Behind The Back Shrug
Back · Barbell
Barbell Bent Arm Pullover
Back · Barbell
Barbell Bent Over Wide Grip Row
Back · Barbell
Barbell Deadstop Row With Rack
Back · Barbell
Barbell Decline Bent Arm Pullover
Back · Barbell
Barbell Decline Wide Grip Pullover
Back · Barbell
Barbell Incline Rear Delt Row
Back · Barbell
Barbell Incline Row
Barbell Incline Row
Back · Barbell
Barbell Lying Close Grip Overhand Row On Rack
Back · Barbell
Barbell Lying Close Grip Underhand Row On Rack
Back · Barbell
Barbell Lying Row On Rack
Back · Barbell
Barbell One Arm Bent Over Row
Back · Barbell
Barbell Pullover Hold
Back · Barbell
Barbell Reverse Grip Bent Over Row
Back · Barbell
Barbell Reverse Grip Incline Bench Row
Back · Barbell
Barbell Wide Pullover
Back · Barbell
Barbell Zercher Back Extension
Back · Barbell
Brachialis Narrow Pull Ups
Back · Bodyweight
Cable Bar Lateral Pulldown
Back · Cable
Cable Bent Over Reverse Grip Row
Back · Cable
Cable Bent Over Row
Cable Bent Over Row
Back · Cable
Cable Bent Over Row With Bar
Back · Cable
Cable Bent Over Row With Rope Attachment
Back · Cable
Cable Close Grip Front Lat Pulldown
Back · Cable
Cable Cross Over Lateral Pulldown
Back · Cable
Cable Decline Seated Wide Grip Row
Back · Cable
Cable Elevated Row
Cable Elevated Row
Back · Cable
Cable Floor Seated Wide Grip Row
Back · Cable
Cable Half Kneeling Push Pull
Back · Cable
Cable High Row (kneeling, Rope Attachment)
Back · Cable
Cable High Row With Chest Support
Back · Cable
Cable Incline Bench Row
Back · Cable
Cable Incline Pushdown
Back · Cable
Cable Kneeling Leaning Forward One Arm Row
Back · Cable
Cable Kneeling One Arm Lat Pulldown
Back · Cable
Cable Kneeling One Arm Row
Back · Cable
Cable Kneeling Single Lat Pulldown
Back · Cable
Cable Lat Pulldown Full Range Of Motion
Back · Cable
Cable Lateral Pulldown (with Rope Attachment)
Back · Cable
Cable Lateral Pulldown With V Bar
Back · Cable
Cable Low Row With Rope Attachment
Back · Cable
Cable Low Seated Row
Back · Cable
Cable Lying Extension Pullover (with Rope Attachment)
Back · Cable
Cable Neutral Grip Lat Pulldown
Back · Cable
Cable One Arm Bent Over Row
Back · Cable
Cable One Arm Lat Pulldown
Back · Cable
Cable One Arm Pulldown
Back · Cable
Cable One Arm Straight Back High Row (kneeling)
Back · Cable
Cable One Arm Twisting Seated Row
Back · Cable
Cable Palm Rotational Row
Back · Cable
Cable Parallel Grip Lat Pulldown On Floor
Back · Cable
Cable Pushdown (straight Arm) Ii
Back · Cable
Cable Rear Delt Row (parallel Bar)
Back · Cable
Cable Rear Pulldown
Cable Rear Pulldown
Back · Cable
Cable Reverse Grip Pulldown
Back · Cable
Cable Reverse Grip Straight Back Seated High Row
Back · Cable
Cable Rope Crossover Seated Row
Back · Cable
Cable Rope Elevated Seated Row
Back · Cable
Cable Rope Extension Incline Bench Row
Back · Cable
Cable Seated High Row (v Bar)
Back · Cable
Cable Seated Lats Focused Row
Back · Cable
Cable Seated On Floor Row With Rope
Back · Cable
Cable Seated One Arm Alternate Row
Back · Cable
Cable Seated Pullover
Back · Cable
Cable Seated Row (bent Bar)
Back · Cable
Cable Seated Supine Grip Row
Back · Cable
Cable Seated Wide Grip Row
Back · Cable
Cable Single Arm High Row
Back · Cable
Cable Single Arm High Row With Chest Support
Back · Cable
Cable Single Arm High Scapular Row
Back · Cable
Cable Single Arm Low Scapular Row
Back · Cable
Cable Split Stance Single Arm Row
Back · Cable
Cable Squat Row (with Rope Attachment)
Back · Cable
Cable Standing Close Grip Row
Back · Cable
Cable Standing Lat Pushdown (rope Equipment)
Back · Cable
Cable Standing Row
Cable Standing Row
Back · Cable
Cable Standing Row (v Bar)
Back · Cable
Cable Standing Twist Row (v Bar)
Back · Cable
Cable Straight Arm Pulldown (version 2)
Back · Cable
Cable Straight Arm Pulldown (with Rope)
Back · Cable
Cable Straight Back Seated Row
Back · Cable
Cable Twisting Pull
Cable Twisting Pull
Back · Cable
Cable Twisting Standing High Row
Back · Cable
Cable Twisting Standing Row
Back · Cable
Cable Underhand Pulldown
Back · Cable
Cable Upper Row
Cable Upper Row
Back · Cable
Cable Wide Grip Behind Neck Pulldown
Back · Cable
Cable Wide Neutral Grip Pulldown
Back · Cable
Cable Wide Pulldown
Cable Wide Pulldown
Back · Cable
Cat Stretch M
Cat Stretch M
Back · Bodyweight
Chin Ups (narrow Parallel Grip)
Back · Bodyweight
Close Grip Chin Up
Close Grip Chin Up
Back · Bodyweight
Cross Over Shoulder Stretch
Back · Bodyweight
Dumbbell Bent Over Reverse Row
Back · Dumbbell
Dumbbell Bent Over Row Against Wall
Back · Dumbbell
Dumbbell Bent Over Row V2
Back · Dumbbell
Dumbbell Bent Over Row With Chest Support
Back · Dumbbell
Dumbbell Bent Over Scapula Row
Back · Dumbbell
Dumbbell Bent Over Single Arm Row
Back · Dumbbell
Dumbbell Hammer Grip Incline Bench Two Arm Row
Back · Dumbbell
Dumbbell Head Supported Row
Back · Dumbbell
Dumbbell Hyperextension
Back · Dumbbell
Dumbbell Incline Row
Back · Dumbbell
Dumbbell Lying Close Grip Parallel Row On Rack
Back · Dumbbell
Dumbbell Lying Pullover On Exercise Ball
Back · Dumbbell
Dumbbell Lying Rear Delt Row
Back · Dumbbell
Dumbbell Lying Row On Rack
Back · Dumbbell
Dumbbell Lying Wide Grip Row On Rack
Back · Dumbbell
Dumbbell One Arm Pullover On Exercise Ball
Back · Dumbbell
Dumbbell One Arm Row (rack Support)
Back · Dumbbell
Dumbbell Palm Rotational Bent Over Row
Back · Dumbbell
Dumbbell Pullover Hip Extension On Exercise Ball
Back · Dumbbell
Dumbbell Rdl And Bent Over Row
Back · Dumbbell
Dumbbell Reverse Grip Incline Bench One Arm Row
Back · Dumbbell
Dumbbell Reverse Grip Incline Bench Two Arm Row
Back · Dumbbell
Dumbbell Straight Arm Pullover
Back · Dumbbell
Exercise Ball Lower Back Prone Stretch
Back · Ball
Exercise Ball Lower Back Stretch (pyramid)
Back · Ball
Exercise Ball Lying Side Lat Stretch
Back · Ball
Ez Bar Reverse Grip Bent Over Row
Back · EZ Bar
Fixed Bar Back Stretch
Back · Bodyweight
Inverted Row With Straps
Back · TRX
Kettlebell Alternating Renegade Row
Back · Kettlebell
Kettlebell Alternating Row
Back · Kettlebell
Kettlebell One Arm Row
Back · Kettlebell
Kettlebell Pullover 3 Month Position
Back · Kettlebell
Kettlebell Two Arm Row
Back · Kettlebell
Lever Assisted Chin Up
Back · Leverage Machine
Lever Assisted Standing Chin Up
Back · Leverage Machine
Lever Back Extension (version 2)
Back · Leverage Machine
Lever Bent Over Neutral Grip Row (with Chest Support)
Back · Leverage Machine
Lever Bent Over Row (plate Loaded)
Back · Barbell
Lever Bent Over Row (with Chest Support)
Back · Leverage Machine
Lever Bent Over Row With V Bar (plate Loaded)
Back · Barbell
Lever Bent Over Single Arm Neutral Grip Row (with Chest Support)
Back · Leverage Machine
Lever Bent Over Single Arm Wide Grip Row (with Chest Support)
Back · Leverage Machine
Lever Bent Over Wide Grip Row (with Chest Support)
Back · Leverage Machine
Lever Bent Over Wide Row (plate Loaded)
Back · Leverage Machine
Lever Cable Rear Pulldown
Back · Leverage Machine
Lever Front Pulldown
Back · Leverage Machine
Lever Gripless Shrug (version 2)
Back · Leverage Machine
Lever High Row (plate Loaded)
Back · Leverage Machine
Lever High Row (plate Loaded) (version 2)
Back · Leverage Machine
Lever High Row (plate Loaded) (version 3)
Back · Leverage Machine
Lever Lateral Pulldown (plate Loaded)
Back · Leverage Machine
Lever Lateral Wide Pulldown
Back · Leverage Machine
Lever Low Row (plate Loaded)
Back · Leverage Machine
Lever Lying Banded T Bar Row
Back · Leverage Machine
Lever Multy Mode Rope Lat Pulldown
Back · Leverage Machine
Lever Neutral Grip Seated Row (plate Loaded)
Back · Leverage Machine
Lever One Arm Bent Over Row (plate Loaded)
Back · Barbell
Lever One Arm Lateral High Row
Back · Leverage Machine
Lever One Arm Lateral Wide Pulldown (plate Loaded)
Back · Leverage Machine
Lever One Arm Low Row (plate Loaded)
Back · Leverage Machine
Lever Pronated Grip Seated Row (plate Loaded)
Back · Leverage Machine
Lever Pronated Grip Seated Scapular Retraction Shrug (plate Loaded)
Back · Leverage Machine
Lever Pullover (plate Loaded)
Back · Leverage Machine
Lever Reverse Grip High Row (plate Loaded)
Back · Leverage Machine
Lever Reverse Grip Vertical Row
Back · Leverage Machine
Lever Reverse T Bar Row
Back · Leverage Machine
Lever Row (plate Loaded)
Back · Leverage Machine
Lever Seated Row
Lever Seated Row
Back · Leverage Machine
Lever Seated Row (plate Loaded)
Back · Leverage Machine
Lever Seated Row (version 2)
Back · Leverage Machine
Lever Single Arm Neutral Grip Seated Row (plate Loaded)
Back · Leverage Machine
Lever T Bar Reverse Grip Row
Back · Leverage Machine
Lever T Bar Row (plate Loaded)
Back · Leverage Machine
Lever Unilateral Row
Back · Leverage Machine
Long Lever Lying Back Extension
Back · Leverage Machine
Lying Leg Tuck Hip Back To Right Stretch
Back · Bodyweight
Reaching Upper Back Stretch Back
Back · Bodyweight
Reaching Upper Back Stretch_back
Back · Bodyweight
Resistance Band 45 Degrees Hyperextension
Back · Band
Resistance Band Bent Over Row
Back · Band
Resistance Band Seated Straight Back Row
Back · Band
Revers Grip Chin Up
Revers Grip Chin Up
Back · Bodyweight
Roll Kneeling Upper Back Rotation
Back · Bodyweight
Seated Lower Trunk Extensor Lateral Flexor Stretch
Back · Bodyweight
Single Arm Lat Stretch Against Wall
Back · Others
Sitting Bent Over Back Stretch Back
Back · Bodyweight
Sitting Bent Over Back Stretch_back
Back · Bodyweight
Sitting Crossed Legged Reach Forward Stretch_back
Back · Bodyweight
Sitting Side Reach Stretch Back
Back · Bodyweight
Smith Back Shrug
Smith Back Shrug
Back · Smith Machine
Smith Back Wide Shrug
Back · Smith Machine
Smith Bent Over Narrow Pronated Grip Row
Back · Smith Machine
Smith Bent Over Narrow Supinated Grip Row
Back · Smith Machine
Smith Bent Over Pronated Grip Row
Back · Smith Machine
Smith Bent Over Row (version 2)
Back · Smith Machine
Smith Bent Over Row Version 2
Back · Smith Machine
Smith One Arm Row
Smith One Arm Row
Back · Smith Machine
Smith Reverse Grip Bent Over Row
Back · Smith Machine
Smith Shrug
Smith Shrug
Back · Smith Machine
Smith Single Arm Bent Over Row
Back · Smith Machine
Smith Wide Shrug
Smith Wide Shrug
Back · Smith Machine
Standing Lateral Stretch
Back · Bodyweight
Standing Reach Up Back Rotation Stretch Back
Back · Bodyweight
Standing Reach Up Back Rotation Stretch_back
Back · Bodyweight
Trap And Neck Stretch
Back · Bodyweight
Underhand Grip Inverted Back Row
Back · Bodyweight
Weighted Hyperextension
Back · Others
Weighted One Hand Pull Up
Back · Weighted
Wrap Arround Shoulder Stretch
Back · Bodyweight
← Back to the full Exercise Library